

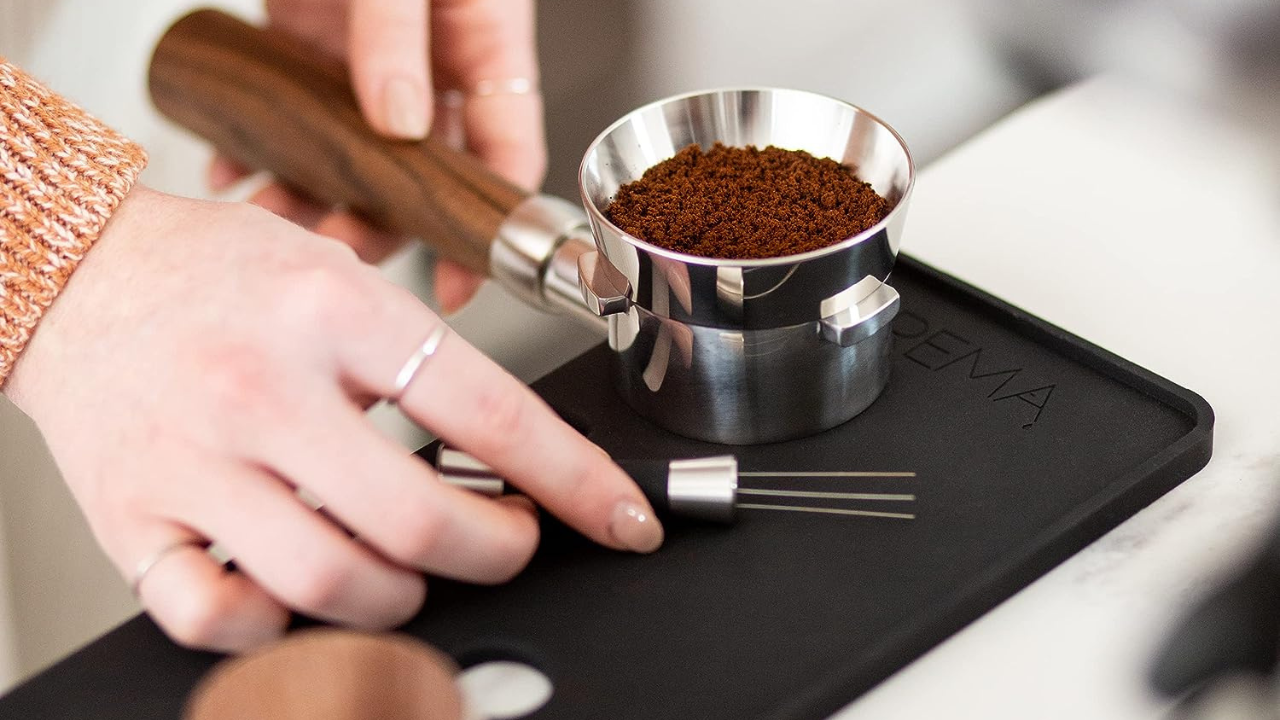
A WDT tool is a handle with several very fine needles. You stir it through the grounds in your portafilter before tamping, it breaks up clumps, and your shots stop channeling. That's the whole idea.
It's the cheapest meaningful upgrade in espresso, and it's also widely misunderstood — including being confused with distribution tools, which do something completely different. Here's the useful version.
Where it came from
The Weiss Distribution Technique is named after John Weiss, who described it on the Home-Barista forum in 2005 using a bent paperclip. Nobody was selling a tool for it. The idea spread because it worked, and the commercial versions came later.
That origin tells you something worth keeping in mind: the technique is what matters. A $6 tool and a $45 tool do the same job if the needles are the right gauge.
The problem it actually solves

When coffee comes out of a grinder it doesn't land as a uniform fluffy pile. It lands in clumps, and the main reason is static — grinding generates a charge, fine particles stick to each other and to the walls of the basket, and you end up with dense lumps separated by looser patches.
Tamp that and you've locked the unevenness in. Dense areas resist water; loose areas don't. Water takes the easy route, blasts through the loose channels, barely touches the dense sections, and you get a shot that's simultaneously over-extracted and under-extracted. That's channeling, and it tastes sour and bitter at the same time.
WDT breaks the clumps before you tamp, so the bed has uniform density and water moves through it evenly. On a bottomless portafilter the difference is visible immediately — sprayers and jets become a single even stream.
WDT tools and distribution tools are not the same thing
These get used interchangeably and they shouldn't be.
A WDT tool has needles. It works through the full depth of the coffee bed, breaking up clumps wherever they are. It fixes density problems.
A distribution tool — also called a leveler or OCD — is a flat spinning disc that sits on the rim of the basket and rotates. It works on the top few millimetres only. It fixes surface flatness, not internal clumping.
If you have clumps three millimetres down, a distribution tool will spin merrily across the top and leave them exactly where they are. It makes the puck look tidy without changing what the water meets.
The useful order is: dose, WDT, then level or tamp. If you only buy one, buy the WDT tool — it addresses the cause rather than the appearance.
How to actually do it
Four things separate WDT that works from WDT that's theatre.
Needle gauge matters. You want roughly 0.3–0.4mm. Thin needles slip between particles and break clumps without dragging the bed around. Anything from 0.5mm up starts behaving like a stick — it ploughs furrows and pushes grounds rather than separating them. This is the single specification to check before buying, and it's the one most product pages don't list.
Go to the bottom. The most common mistake is stirring the surface. Clumps sit throughout the bed, and the bottom of the basket is where a dense patch does the most damage. Take the needles all the way down without scraping the basket.
Small circles, not big sweeps. Work in small overlapping circles or a slow spiral from the outside in. Big stirring motions move coffee from one side of the basket to the other, which creates the unevenness you're trying to remove.
Ten to twenty seconds is plenty. More isn't better. Over-working the bed generates additional fines and starts compacting the grounds, and you'll feel the shot slow down. When the surface looks uniformly loose, stop.
Then level and tamp as normal.
The trick that makes WDT easier
Since the clumping is largely electrostatic, you can attack it at the source. Before grinding, add a tiny amount of water to the beans — a single spritz from a mister, or a drop stirred through with a spoon. This is the Ross Droplet Technique, and it dramatically reduces static.
Less static means fewer clumps, less retention in the grinder, and no coffee leaping onto the counter. It doesn't replace WDT, but it makes WDT faster and the whole process less messy. It costs nothing to try.
When WDT matters most
It's not equally useful for everyone.
Worth it:
- You single-dose. Single-dosing grinders clump more than hoppered ones, full stop.
- You use a bottomless portafilter and can see what's happening.
- You drink light roasts, which are denser, ground finer, and far less forgiving of uneven extraction.
- Your grinder produces a lot of fines — most flat burr grinders do.
- Your shots are inconsistent for no apparent reason. This is the classic symptom.
Less useful:
- You use a pressurized (dual-wall) basket, which manufactures its own back pressure and hides distribution problems by design.
- You have a superautomatic, where the machine handles the puck and you never see it.
- You have a machine with assisted tamping and rarely touch the grounds.
What to buy
The LUCCA WDT Tool at $45 is what we use and what we recommend — correct needle gauge, weighted handle, and a stand so the needles aren't sitting loose in a drawer bending themselves.
If you want to level as well as distribute, the Mahlkönig distribution tool at $29.99 is the sensible companion piece — used after WDT, not instead of it. At the other end, The Shot Collar ($97) and the BT Wedge ($169) are proper machined pieces if you want something that'll outlive the machine.
And a straight answer, since we sell these: a bundle of acupuncture needles in a cork works. It's how a lot of people start, and it's how the technique was invented. What you're paying for at $45 is a tool that's comfortable, stays sharp, and has somewhere to live. If money is tight, spend it on the grinder first — that will change your espresso more than any preparation tool will.
Browse all accessories · Browse grinders
Frequently asked questions
What is a WDT tool used for?
Breaking up clumps in ground coffee before tamping. Coffee leaves a grinder in clumps because of static, and tamping locks that unevenness into the puck. Stirring with fine needles gives the bed uniform density, which stops water channeling through the loose spots.
Does WDT actually make a difference?
Yes, and it's most obvious on a bottomless portafilter — sprayers and side jets usually disappear after one session of doing it properly. The effect is largest if you single-dose, drink light roasts, or use a grinder that produces a lot of fines. With a pressurized basket you'll notice very little.
What size needles should a WDT tool have?
Around 0.3–0.4mm. Thin needles pass between particles and break clumps apart. Anything thicker than about 0.5mm drags the coffee bed around instead of separating it, which creates the unevenness you're trying to fix.
Is a WDT tool the same as a distribution tool?
No. A WDT tool has needles and works through the full depth of the coffee bed to break up clumps. A distribution tool is a spinning disc that levels the top few millimetres only. They solve different problems, and if you're buying one, the WDT tool addresses the underlying cause.
How long should you WDT for?
Ten to twenty seconds, using small overlapping circles that reach the bottom of the basket. Longer isn't better — over-stirring generates extra fines and begins compacting the bed, which slows the shot down.
Can you make your own WDT tool?
Yes. The technique was invented with a bent paperclip, and acupuncture needles set in a cork are a common homemade version that works properly. A bought tool is more comfortable and more durable, but there's nothing magic in it.
Do I still need to tamp after using a WDT tool?
Yes. WDT fixes distribution; tamping compresses the bed so water meets uniform resistance. The order is dose, WDT, level if you're using a distribution tool, then tamp.
The short version
Needles of about 0.3–0.4mm, small circles down to the bottom of the basket, ten to twenty seconds, then tamp. It's the cheapest fix for channeling there is, and it matters most if you single-dose or drink light roasts.
Shots still channeling after all that? Call us at 800-410-8867 — it's usually the grinder, and we'll tell you if it is.