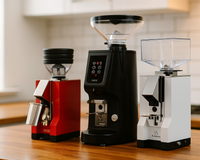
Your coffee grinder is one of the most important tools in your coffee setup. Even the best espresso machine can’t overcome the problems caused by old coffee oils, residue, and buildup inside a neglected grinder. Over time, these residues can dull burrs, alter grind consistency, and ruin the flavor of your espresso.
This guide will show you how to clean your burr grinder properly, how often to do it, and the best maintenance habits to keep your grinder performing like new for years to come.
Why You Must Clean Your Burr Grinder

Most people clean their espresso machines regularly but forget about the grinder. Here’s why that’s a mistake:
Better flavor – Coffee oils and fine particles cling to burrs and the grind chamber. Over time, these oils go rancid and mix with fresh grounds, leading to bitter, inconsistent coffee.
Improved grind consistency – Old coffee dust and residue can clog up the burrs and chute, affecting how evenly beans are ground. A dirty grinder can produce both too-fine and too-coarse particles in the same batch.
Related product - Turin DF64 Gen 2.3 Espresso Grinder
Longer lifespan – A clean grinder runs smoother and puts less stress on the motor and burr assembly. Regular cleaning can extend the life of your grinder dramatically.
Easier bean switching – If you like to switch between dark and light roasts, cleaning prevents cross-contamination and lingering flavors.
How Often Should You Clean

How often you clean depends on how much you use your grinder and what kinds of beans you grind.
Light home use (1–2 bags per week): Light clean monthly; deep clean every 3–4 months
Heavy home or small café use: Light clean every 2 weeks; deep clean monthly
Frequent roast switching: Clean before switching to avoid flavor carryover
A quick clean with grinder cleaning tablets once a month can keep buildup under control, but it doesn’t replace a full disassembly cleaning.
Related product - Turin DF54 Espresso Grinder
What You’ll Need
Soft or medium bristle brush (nylon or goat hair)
Food-safe grinder cleaning pellets
Vacuum with a small nozzle
Microfiber cloth
Toothpicks or cotton swabs for tight spaces
Optional: compressed air
Your grinder’s manual (always reference it before taking anything apart)
Avoid using rice as a cleaning substitute. It’s too hard and can damage burrs or clog the grinder with starch residue.
Shop all our accessories and cleaning gear >
Step-by-Step Cleaning Process

Unplug and empty the grinder
Always start by unplugging it. Remove beans from the hopper and run the grinder for a few seconds to clear out remaining beans.
Optional: Run cleaning pellets
Add a tablespoon of cleaning pellets to the hopper and grind through completely. This helps remove surface oils and loose residue. Discard the output and run a small handful of beans afterward to purge any leftover cleaner.
Related - Why Consistent Maintenance Keeps Machines Running Smoothly
Disassemble the burr section
Remove the hopper and upper burr following the manual’s instructions. Take note of how parts are aligned or take a quick photo to remember placement.
Brush and vacuum
Use the brush to scrub the burr teeth, chamber walls, and chute. Vacuum away loosened debris. For corners or threads, use toothpicks or cotton swabs. If you use compressed air, spray gently to avoid driving particles deeper inside.
Related product - LUCCA Coffee Vacuum
Related product - Home Barista Cleaning Kit
Related product - Pallo Grindminder Cleaning Brush
Wipe and inspect
Use a dry microfiber cloth to wipe burr surfaces, the hopper, and any removable parts. Inspect the burrs for dull edges or chips.
Reassemble and test
Reinstall the burrs and hopper, plug the grinder back in, and grind a small dose of beans to purge dust. Check that grind size and calibration remain correct.
Maintenance Tips
Always keep the grinder dry—never use water unless the manufacturer specifically allows it.
Related - Espresso Machine Warm-Up Times & Why They Matter
Store your grinder in a cool, dry place to avoid humidity buildup.
Wipe the hopper regularly with a dry cloth to prevent oily residue.
Take photos when disassembling to make reassembly simple.
Clean more often if you use dark, oily roasts.
Keep a small brush handy and give the burr chamber a quick sweep after every few uses.
Common Mistakes to Avoid
Using rice—it can damage burrs and jam the motor.
Skipping deep cleans—cleaning tablets alone won’t reach fine powder buildup around the burrs.
Using water—moisture leads to rust and clogs.
Forgetting calibration—some grinders lose their zero point after full disassembly. Note your grind setting beforehand.
Final Thoughts
Cleaning your burr grinder might not be the most exciting part of brewing coffee, but it’s one of the most rewarding. A clean grinder gives you more consistent extractions, truer flavors, and a smoother workflow every morning. Make it a habit—your coffee (and your grinder) will thank you.


