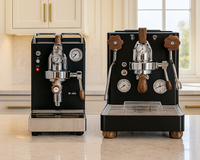
If you’ve ever dived deep into the world of espresso, you’ve probably seen “9 bars of pressure” mentioned everywhere — in product specs, coffee forums, and café conversations. But what does that really mean? Why 9 bars? Who decided that was the standard? And more importantly, should you always stick to it? In this guide, we’ll unpack the science, history, and art of espresso pressure, explain why 9 bars became the sweet spot, and explore when breaking that rule can actually unlock better flavor. Whether you’re pulling shots on a Lelit Bianca V3, a Rocket R58, or a LUCCA A53 Mini, understanding pressure is one of the keys to mastering true espresso extraction.

What “Bars of Pressure” Actually Means
A “bar” is a unit of pressure equal to the atmospheric pressure at sea level — roughly 14.5 psi. So when your espresso machine advertises 9 bars, that means it’s pushing about 130 psi of force through a compact coffee puck. That’s nearly ten times the pressure in your car’s tires — all concentrated on a few grams of finely ground coffee. This immense pressure is what transforms water and coffee into a rich, concentrated espresso shot. It’s what creates emulsified oils, suspended solids, and that velvety crema we all crave.
A Brief History of Espresso Pressure

Before the mid-20th century, espresso wasn’t brewed anywhere near 9 bars. Early “steam” espresso machines used steam pressure, usually 1–2 bars at most. These machines brewed hot, bitter coffee rather than true espresso. Then came a pivotal innovation. In 1947, Italian engineer Achille Gaggia patented a lever-operated espresso machine. His design used a piston to mechanically force water through the coffee puck, producing up to 8–10 bars of pressure. This breakthrough created the modern espresso as we know it — rich, syrupy, and crowned with crema. From there, 9 bars became the benchmark. Manufacturers found it consistently yielded a balanced shot: enough force to extract oils and solubles, without over-compacting the puck or over-extracting the coffee.
Why 9 Bars Became the Gold Standard
There’s no law that says espresso must be brewed at 9 bars, but decades of testing and barista experience have proven that it’s a sweet spot between flavor, consistency, and machine reliability.
1. Ideal Flow Rate
At around 9 bars, properly ground coffee allows a 25–30 second extraction — the target window for a balanced espresso. Lower pressure can lead to slow, sour shots; higher pressure can result in channeling and bitterness.
2. Even Extraction
Pressure helps water penetrate the puck evenly. If it’s too low, water takes the path of least resistance and misses some grounds. Too high, and the puck collapses, causing uneven flow.
3. Optimal Crema and Mouthfeel
9 bars emulsifies coffee oils efficiently, producing that creamy texture and golden foam. Excessive pressure breaks the emulsion and releases harsh compounds, while lower pressure may yield thin, under-developed crema.
4. Machine Longevity
Espresso machines are engineered around 9 bars. Pumps, valves, and gaskets are designed to operate efficiently at this level. Running higher consistently can cause premature wear.

How Pressure Affects Flavor
Pressure acts as the force multiplier in extraction — it determines how deeply water interacts with the coffee grounds.
| Pressure Level | Flavor Profile | Crema & Body |
|---|---|---|
| 6–7 bars | Bright, tea-like acidity; lighter body | Thin crema |
| 8–9 bars | Balanced sweetness, creamy texture | Classic golden crema |
| 10+ bars | Over-extracted, bitter, woody | Dark crema, harsh finish |
Light roasts tend to prefer slightly higher pressures to aid solubility, while dark roasts — already more soluble — often taste best at 7–8 bars.
Understanding Pressure Profiling
Modern machines like the Lelit Bianca V3 allow you to go beyond fixed pressure. Through pressure profiling, you can manually or electronically vary pressure during the shot to enhance flavor and mouthfeel.
Instead of hitting the puck with full 9 bars instantly, you gradually increase and decrease pressure throughout extraction. This mimics the natural curve of lever machines and lets you emphasize sweetness or body.
| Phase | Time | Pressure | Purpose |
|---|---|---|---|
| Pre-infusion | 0–8 sec | 2–4 bars | Gently saturate puck |
| Ramp-up | 8–12 sec | 6–9 bars | Build extraction force |
| Decline | 20–30 sec | 7–8 bars | Balance acidity, limit bitterness |
Pressure profiling gives you control over variables fixed-pressure machines can’t. Light roasts benefit from longer pre-infusions and lower peak pressures; dark roasts may taste smoother with a quick ramp-up and early decline.
Learn more in our guide: Pressure Profiling in Espresso Machines

When to Break the 9-Bar Rule
While 9 bars is the standard, it’s not sacred. Advanced baristas — and increasingly home users — experiment outside that range for good reason.
1. Lighter Roasts
Lightly roasted beans are denser and less soluble. Using 7–8 bars with a longer pre-infusion can extract more evenly without excessive acidity. The Lelit Bianca V3’s paddle control lets you start low (3–4 bars), hold steady mid-shot, and finish at 8–9 bars for a syrupy yet bright cup.
2. Dark Roasts
Dark roasts are fragile — higher pressures can cause bitterness. Drop to 6–7 bars with shorter extraction times to emphasize chocolate and caramel tones.
3. Specialty Techniques
Blooming espresso: pre-infuse at 2 bars for 10 seconds, pause, then resume at full pressure.
Turbo shots: use 6 bars with a faster flow for filter-like clarity.
Lever-style profiles: replicate the declining pressure curve of traditional levers — great for medium roasts.
Pump Types and Pressure Stability

Not all machines manage pressure the same way. Understanding your pump system helps you dial in consistency.
Vibratory pumps — found in compact home machines like the Lelit Mara X. They produce ~15 bars max but are regulated to 9 bars. Inexpensive and reliable, but less stable during extraction.
Rotary pumps — found in prosumer models like the Bianca V3 and LUCCA A53 Mini. Provide precise, consistent pressure and quieter operation. Ideal for profiling and plumbing directly.
Manual or lever systems — naturally create pressure curves that taper off as the spring relaxes, offering an organic, hands-on way to experiment.
Pressure vs. Flow: The Hidden Relationship
While pressure gets the attention, flow rate (how much water passes through per second) is equally crucial. Too much pressure without adequate flow compresses the puck without improving extraction. Machines like the Bianca V3 let you manipulate both via a flow paddle, giving ultra-fine control.
| Scenario | Pressure | Flow | Result |
|---|---|---|---|
| High pressure + low flow | 9–10 bars / 1.0 ml-s | Bitter, over-extracted | |
| Moderate pressure + balanced flow | 8–9 bars / 1.5 ml-s | Ideal balance | |
| Low pressure + high flow | 6 bars / 2.0 ml-s | Sour, under-extracted |
Stable pressure with predictable flow equals repeatable espresso.
Measuring and Adjusting Pressure
If you’re curious about your machine’s performance, measure and adjust using:
• A portafilter pressure gauge — attaches to the grouphead to read true brew pressure.
• Blind basket test — run a shot with a blank basket and observe the manometer.
• Flow-control adjustments — recalibrate pre-infusion pressure on machines like the Bianca V3.
Note: 9 bars on the gauge doesn’t always equal 9 bars at the puck — tubing friction can reduce real brew pressure by about 1 bar.
Common Pressure-Related Problems
| Problem | Likely Cause | Fix |
|---|---|---|
| Thin, sour espresso | Too low pressure / coarse grind | Finer grind, verify 9 bars |
| Bitter espresso | Excess pressure / over-extraction | Reduce to 8 bars, shorten shot |
| Channeling / spurting | Uneven puck prep | Use WDT tool, level tamp, pre-infuse |
| No crema | Low pressure / stale beans | Fresh beans, check pump pressure |
Myth Busting: 15-Bar Machines
Entry-level espresso machines often boast “15-bar pumps” or “20-bar pressure.” Higher numbers don’t mean better espresso. Those machines use pumps capable of high pressure but are internally regulated down to around 9 bars. Brewing above 10 bars leads to over-extraction, collapsed pucks, and pump strain. The real differentiator is pressure stability, not peak capability.
How to Adjust Brew Pressure Safely
If your shots are consistently off and you’ve ruled out grind and temperature, a small pressure adjustment might help.
-
Check with a gauge to confirm brew pressure.
-
Locate the OPV (Over-Pressure Valve).
-
Make ¼-turn adjustments — clockwise to increase, counterclockwise to decrease.
-
Test and taste after each tweak.
For machines under warranty, consult your retailer before adjusting. At Cliff & Pebble, we’re happy to walk you through safe calibration.
Real-World Example: Lelit Bianca V3

The Lelit Bianca V3 exemplifies pressure mastery. Its paddle-based flow-control system lets you start with gentle pre-infusion, ramp to 9 bars, and taper off smoothly — all in real time. This makes it ideal for lower-pressure turbo shots, gentle pre-infusions, and variable decline curves for syrupy mouthfeel. Explore it here: Lelit Bianca V3 Espresso Machine
The Future of Espresso Pressure
As espresso tech evolves, pressure control is becoming smarter and more customizable. Expect PID-linked pressure profiling, AI-assisted extraction curves, and low-pressure espresso movements that emphasize clarity over crema. We’re entering an age where 9 bars is just the starting point — not the rulebook.
Conclusion

Nine bars of pressure isn’t arbitrary — it’s the product of decades of Italian engineering, physics, and taste refinement. But understanding why it works empowers you to break the rule intelligently. When you learn to manipulate pressure — through profiling, pre-infusion, or simple adjustments — you unlock the ability to tailor every shot to your beans and your palate. Whether you’re chasing perfect clarity in a light Ethiopian roast or bold depth in an Italian blend, remember: pressure is power, but precision is perfection.
Related: Our Favorite Espresso Machine for Light Roast Coffee >


